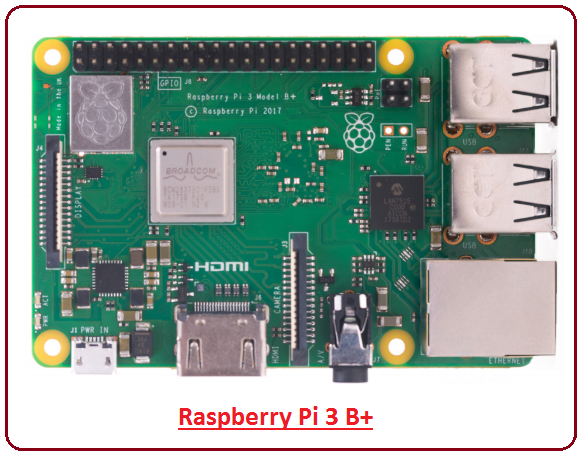
Setting Up a Raspberry Pi


100 Points
Learning Objectives

Raspberry Pi 3 B+
Raspberry Pi 3 B+

These instructions will show you how to download and create the operating system for a Raspberry Pi single-board computer (SBC); and then start up the device.
SBCs are becoming ubiquitous-examples are Nest thermostats and Ring doorbells.
These devices make up the Internet of Things-IoT, which is greatly impacting organizations and everyday life.
In later assignments you will continue working with and experiencing the capabilities of the Raspberry Pi.

After completing this assignment you will be able to:

  1. Obtain latest Raspbian operating system
  2. Create a bootable micro-SD card containing the operating system
  3. Boot the Raspberry Pi
  4. Connect to the WSU Guest wireless network
  5. Configure the Raspberry Pi
  6. Use a web browser and other software on the Raspberry Pi
  7. Install an application on the Raspberry Pi to take screen shots
  8. Upload the screen shot to D2L.

Assignment Overview
This assignment reviews basic computer concepts that you will need in this course and throughout your career.
Somsen 301 makes use of a Raspberry Pi 3 B+.
Please use a 16GB class 10 (or better) microSD card or SanDisk Cruzer or Glide USB flash drive for these assignments.

You are expected to have a working knowledge of SBC hardware and software.
If you do not understand how to use an item, perform a Google Search, refer to the WSU Technology Knowledge Base,  ask a teaching assistant, or ask the instructor.
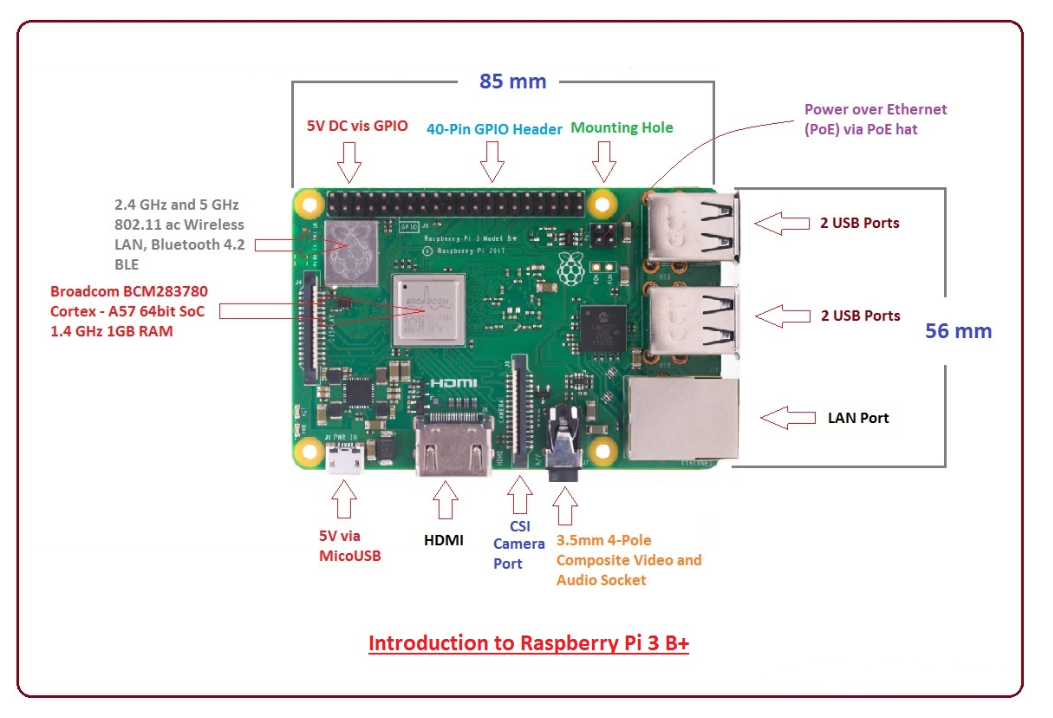
Raspberry Pi 3 Raspberry Pi 3 B+


Exercise 1-Obtain Operating System
  1. These steps are performed on your laptop.
    Download the required files (Raspbian image, Raspberry Pi Imager) from the WSU network at \\mispgp\RaspberryPiAndSoftwareImages\ to your Downloads folder
    or obtain this software from Professor Paulson's OneDrive ReadOnly folder, RaspberryPiAndSoftwareImages
    Alternatively you can obtain the software at these websites:
    Raspberry Pi Imager: https://www.raspberrypi.org/software/
    Raspbian Operating System: https://www.raspberrypi.org/downloads/raspbian/.
    VNC Viewer: https://www.realvnc.com/en/connect/download/viewer/ 

    Rasbian with desktop Raspbian Pi Imager


    Save the Raspberry Pi image file to your Downloads folder. Do NOT place it in any OneDrive folder or sub folder. That will cause problems, as it is a large (1.6GB) file.

    Required software Required Software


  2. Use File Explorer, find the Imager install file, and double-click to install Raspberry Pi Imager.

Exercise 2-Flash microSD card
  1. These steps are performed on your laptop.
  2. Install the microSD card into a USB or USB-C reader and plug into your laptop.

    flash raspbian to microSDFlash Raspbian to microSD

  3. Open Imager and make sure it recognizes the microSD card under "Choose Storage".
    If Imager does not appear, you will need to restart your laptop.
  4. Select "Choose OS" and scroll to the bottom until you see "Use Custom". Select "Use Custom" and select your Raspbian Image from your Downloads folder.

    flash raspbian to microSDFlash Raspbian to microSD

  5. Press the Write button. The process will take several minutes.
  6. After the microSD is flashed, open File Explorer on your laptop, navigate to the D: drive, labeled 'boot'.
    This is the microSD card.
    Right-click and choose 'New>Text Document'
  7. Enter your name as the name of the text document, such as 'MyName.txt'
    This will identify you as the owner of the microSD card in case it is turned into Lost & Found.

    create MyName.txtFind 'boot', create 'MyName.txt'


Exercise 3-Boot Raspberry Pi
  1. While the microSD card is flashing, locate a USB keyboard and mouse.
    Plug them into the Pi at your station.
  2. Once the flash is complete and verified, remove the microSD card and put it into the Pi.

    install microSD into PiInstalling microSD into the Pi

  3. Press the power button on the Pi, which should be on top or around the monitor in front of you.
    You should see a red light on the Pi, which indicates power is on.
  4. On your monitor press the button with the colored dot.
    Note that repeatedly pressing this button switches the monitor between displaying your laptop and the Raspberry Pi.
  5. Follow the on-screen instructions to set your country, language and Time-zone.
    Check the boxes for 'Use English language' and 'Use US keyboard'.
  6. Check “This screen shows a black border around the desktop” if you have a black border.
  7. ONLY CONNECT TO WSU GUEST NETWORK!!!
    If prompted make an account and log in.
    Note: you may periodically have to open the Raspberry Pi browser to 'winona.edu' and repeat the WSU Guest Network login process.
  8. When asked to update, click next.
    The update will begin, this make take a few minutes.
    If asked to restart, do so.
  9. On your laptop, open Notepad, choose a password (Please use MagicMirror%).
    Save your password in a file named 'Readme.txt'; in your ' ' folder.
  10. If you forget your password you can change it in the settings, under Pi>Preferences>Raspberry Pi Configuration.

    change passwordChanging Password

  11. In the upper right corner of the desktop hover over the Wi-Fi signal to determine the IP address.
  12. Store this IP address on your laptop in the ReadMe.txt file that contains your password.
    The IP address will be of the format: 10.20.xx.xx
    Note that the IP address will change about every 30 days.
  13. In the upper left corner, you will see the Raspberry Icon, aka 'Menu'
    Click the Raspberry icon, Raspberry then preferences, and Raspberry Pi Configuration.
  14. Click the interfaces tab, Enable SSH and VNC.
  15. Reboot the Raspberry Pi so that all changes take effect.

Exercise 4-Desktop & Screen Shots

Mousepad is the text editor.
Scrot (short for SCReen shOT) takes screen shots that document your work.

  1. On the Raspberry Pi open a terminal window.
  2. In the Terminal window type scrot -h
    This brings up information on how to use scrot.
    Review this information.

    scrot helpscrot help


  3. Note that simply typing scrot in a Terminal window takes a screen shot and stores it in the Raspberry Pi's  '/home/pi' folder.

    screen shotsScrot Screen Shots

  4. Open Mousepad, from the toolbar select Pi>Accessories>Text Editor.
  5. From the menu select Edit>Preferences and uncheck the box 'Use system monospace font' to allow the displayed font size to change.
  6.  Create a file that contains only your name in 72 point font, center it on the screen, and add white space as appropriate-see the image below.
  7. In the terminal window type in scrot -s (scrot select) then click and drag the mouse to select an area around your name in the text file.
    Repeat the process until you have a nicely trimmed image, see below.
  8. Open File Manager, navigate to the /home/pi directory and rename the screen shot to MyName.png
  9. Right click the Pi desktop, select 'Desktop Preferences', under the 'Desktop' tab set the Layout to 'Centre image on screen', and on Picture select the MyName.png file.
    Then click OK.

    desktop settingsDesktop Settings


Upload Screenshot

For this final Exercise read all of these instructions.
You are submitting to the appropriate D2L Assignment folder a screen shot that documents your work.
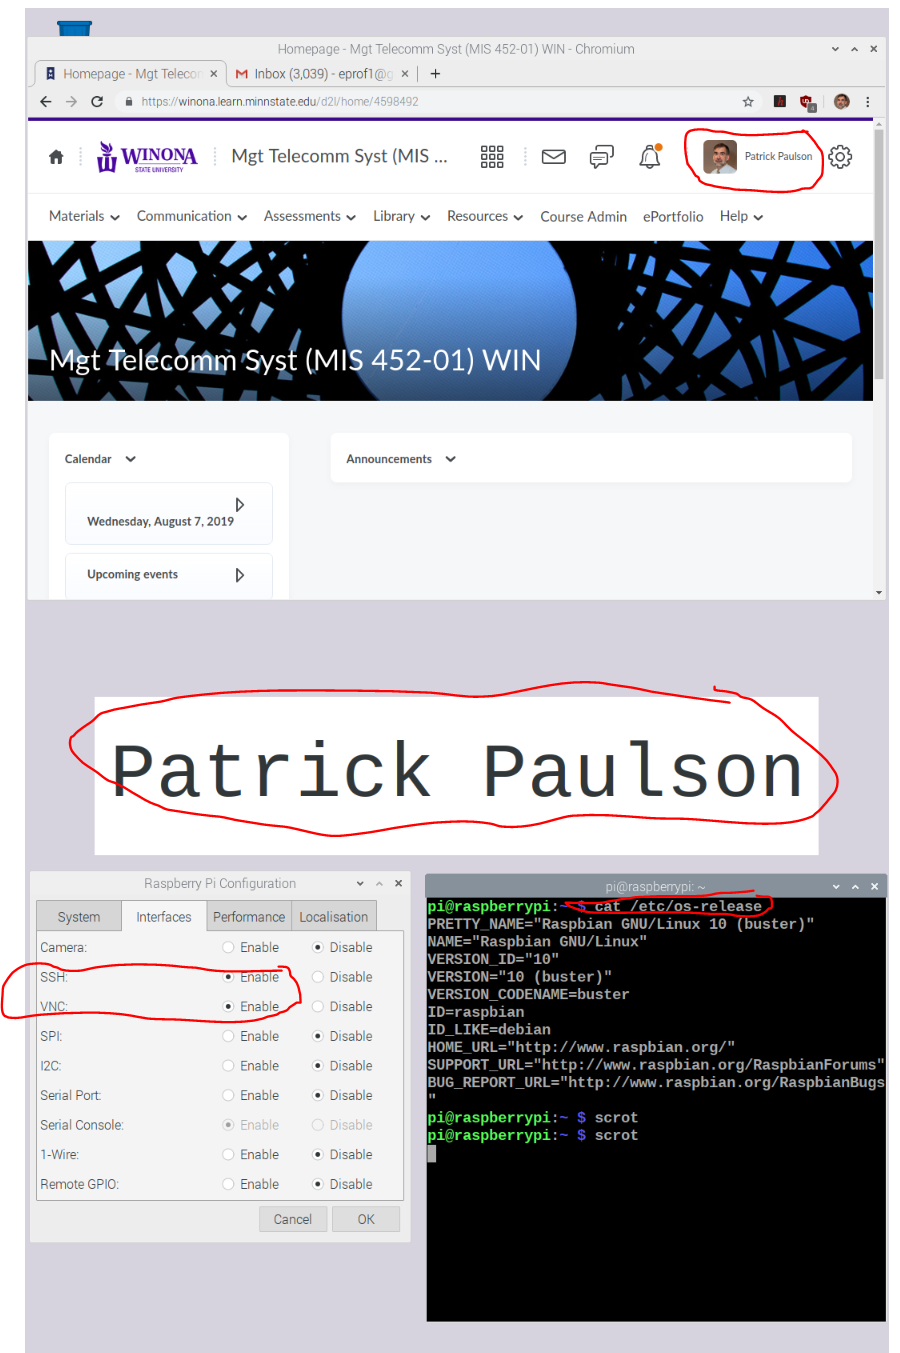
Make sure that the following programs are running on the Raspberry Pi, with:


The screen shot name will be of the format '2019-08-07-125353_1080x1920.scrot.png' and will look something like this:
sample screen shotSample Screen Shot

Use the File Manager and navigate to the '/home/pi' folder to find your screen shot.

(90) 1. On the Raspberry Pi, use the Chromium browser to login to D2L.
Upload your screenshot to the 'IOTP01' D2L Assignment Folder.


Screen Shot IOTP01


Submit Assignment

When all tasks are completed press the Submit button.


(10) 2. Assignment submission


Congratulations! You have successfully created and booted a Raspberry Pi single board computer.
In the next series of assignments you will explore how to communicate with and control the Raspberry Pi from your laptop.


WHEN DONE
SHUTDOWN THE RASPBERRY PI
TURN OFF THE POWER
REMOVE YOUR microSD CARD