Basic Digital Technologies-Part 2


200 points

Learning Objectives

This assignment introduces skills needed for this course, and begins development of a digital technology toolkit that will serve you well in your career.

After completing this assignment you will be able to:

  1. Install and activate Visual Studio Enterprise 2022, including required modules for ASP.NET and Python development
  2. Configure Visual Studio settings for optimized use in this course
  3. Create a GitHub account and verify access via screenshot
  4. Install and verify Git for Windows, and understand its purpose in version control
  5. Authenticate into Zoom, configure settings, and verify your profile and meeting environment
  6. Subscribe to the D2L course calendar feed and integrate it into the Outlook desktop client
  7. Capture, organize, and label multiple screenshots in OneNote
  8. Export your screenshots as a PDF file using Print to PDF, and submit the result to D2L
  9. Maintain accurate file naming and folder structure within your OneDrive-backed course directory
  10. Understand the importance of software setup and personal digital workspace configuration as part of long-term academic and professional success

Exercise-PDF File Creation

You will create one PDF file that contains screenshots documenting the work completed in this assignment.
This PDF will be uploaded to the D2L Assignment folder titled 'Formative00_Part2'.

Make sure you have Windows 11 installed, and you have the option 'Microsoft Print to PDF' in the Print Dialog Box.
If not, contact a TA or the professor.
print to pdf Print dialog box


ScreenShots->Snipping Tool + OneNote

  1. Open Microsoft OneNote on your laptop.
  2. Create a new page and name it Formative00_Part2.
  3. Save this Formative00_Part2.pdf file into your ' ' folder.
  4. Use the Snipping Tool to take each required screenshot (Ex5A, Ex5B, Ex5C, Ex6, Ex7).
  5. After each snip, press Ctrl + V to paste the screenshot into your OneNote page.
  6. Label each screenshot clearly (e.g., "Ex5A – Visual Studio Product Key").
  7. Once all images are added, go to File > Print and choose Microsoft Print to PDF.
  8. When all screenshots are done you will upload the PDF file to the D2L Assignment folder: 'Formative00_Part2'.


In this exercise you install software on your computer.
This is different than installing software on your phone, as it involves two processes-downloading (retrieving the necessary files) and installation (running a program that asks you to choose certain program settings).


Download and install Visual Studio Enterprise 2022 to create and maintain a website, which is how you will complete course assignments.
Create a GitHub account which is used to obtain assignments and learn about version control.
Version control allows many programmers to collaborate on software development without needing to be co-located. It also allows a disciplined methodology to control this software.

  1. Get Visual Studio Enterprise, 64-bit, 2022 or later, from-Azure Dev Tools
    Username is: StarID@go.minnstate.edu
  2. As Visual Studio downloads, retrieve and save your Product Key from the Azure Dev Tools website.
  3. Use NotePad and create a file named 'ProductKey.txt'
  4. Paste your Visual Studio Product Key into this file

(25) 1. Save this file as "ProductKey.txt" in your ' ' folder. Place a copy in your OneNote file.


Install Visual Studio

  1. Please install the ASP.NET and web development, and the Python development modules.
    If you forget to install these modules, you can choose Tools>Get Tools and Features...
    The software is available at no charge to you.
    The installation requires about 8GB of disk space.
    VS Install
  2. If you are using VS 2022 or later you can skip this step, as the extension is already installed.
    If you are still using VS2019 or earlier, you must install the Visual Studio GitHub Extension
    From the menu select Extensions>Manage Extensions and search for 'GitHub Extension'.
    Git Hub Extenstion
  3. Visual Studio Settings
    Open Visual Studio.
    Under Tools>Options change the following settings are optimized for this class.
    >Text Editor>All Languages; check 'Line numbers'
    VS line numbers Check 'Line numbers'

    Under >Web Forms Designer; check 'Legagcy Web Forms designer' and Start Pages in "Design View"
    VS web form designer Enable 'Legacy Web Forms designer'

  4. Update Visual Studio as required.
    Periodically updates are made available for Visual Studio.
    You are notified by a red bell icon in the lower-right.
    Update Available Install updates outside of class, as they can take time.
    Note that you do not have to sign into your Minnstate account to use Visual Studio.
  5. Very Important-Register Visual Studio with your Product Key.
  6. From the Visual Studio menu choose Help > Register Visual Studio.
  7. On the right side of the window that appears there will be a link such as 'Apply Product Key', click that link and paste your Product Key into the dialog box that appears. 
    Follow any prompts.
  8. Use the Snipping Tool to make a screenshot of the window showing that your ProductKey was applied and save the screen shot:
    Product Key Applied

(25) 2. Save this screenshot as "Ex5A" in the OneNote file in your ' ' folder.

Screenshot Ex5A


Create a GitHub account so that you will be able to obtain course assignments in the coming weeks.

  1. Open a browser to GitHub
  2. Log into GitHub and create an account, if you do not already have one.


After creating your GitHub account use File Explorer to navigate to the folder ' .
Use the Snipping Tool to make a screenshot of your GitHub home page.
It will look like this: Github .
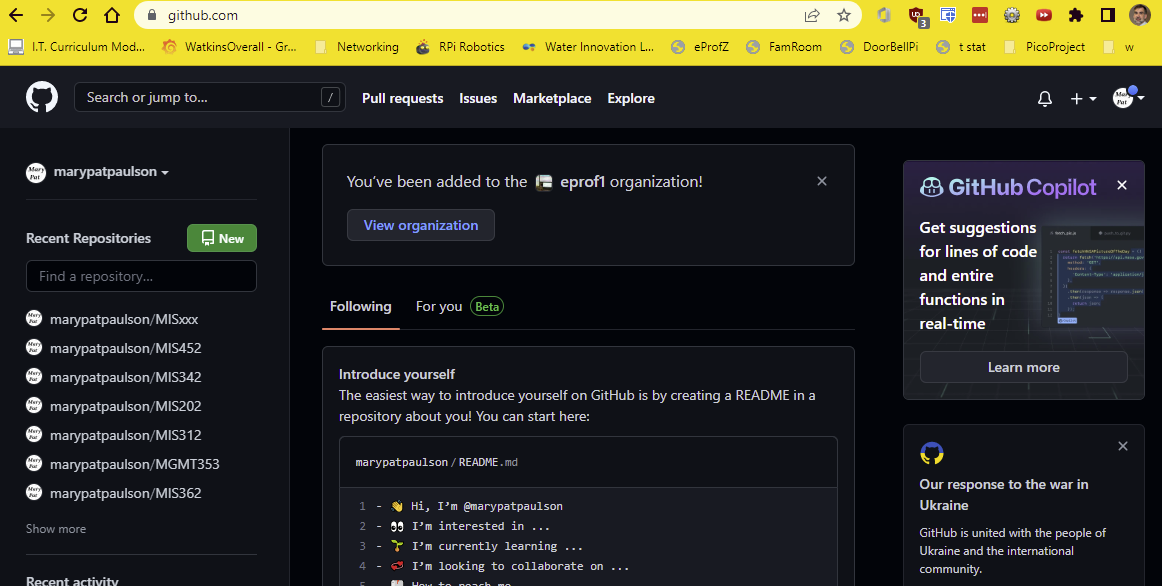
(25) 3. Save the screenshot as "Ex5B" in the OneNote file in your ' ' folder.

Screenshot Ex5B


Download and install Git for Windows, so that Visual Studio can use git commands.
Git For Windows icon

  1. Open a browser to Git for Windows
  2. Download the latest 64-bit version for Windows.
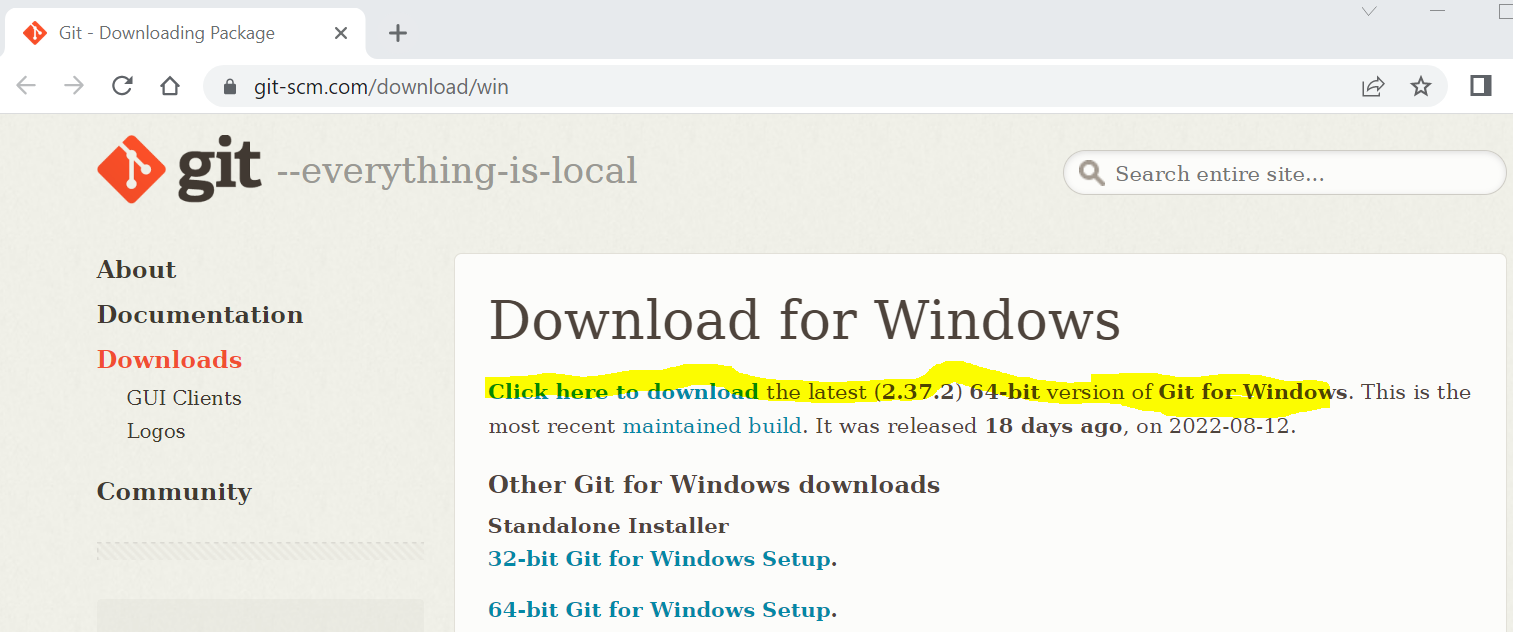
    Git for Windows Download

After installing Git for Windows, open the Control Panel to Programs and Features.
Use File Explorer to navigate to the folder ' .
Use the Snipping Tool to make a screenshot showing that Git for Windows is installed.

(25) 4. Save the screenshot as "Ex5C" in the OneNote file in your ' ' folder.

Screenshot Ex5C


  1. Browse to https://minnstate.zoom.us/       Click the 'Download Client' link at the bottom of the page to install the latest Zoom Client for meetings.
    Zoom Signin
  2. Click the 'Sign in' button, your username is  StarID@go.minnstate.edu ; password is your WSU network password
    Note: This sign in process authenticates you to the Minnstate Zoom system so that you do not show up as a 'Guest' in meetings.
    By authenticating you ensure you will get credit for Attendance when the Professor runs the Zoom Attendance report.
  3. From the D2L 'Course Info' widget click on the url for the web conference.
    eProfessor Zoom Room-https://minnstate.zoom.us/my/eprofessor
    Note: if doing this assignment outside of class time, log into your personal Zoom room.
  4. Under Settings>General, check 'Always show meeting controls'
    The meeting control toolbar will appear at the bottom of your Zoom meeting window-see screenshot in next step.
    Zoom Meeting Controls
  5. On the meeting controls, open the Participants and Chat windows
    Zoom Setup
  6. To prevent audio feedback during Zoom meetings in the classroom, from the meeting controls, lower left corner, choose the Microphone drop down list, then Leave Computer Audio.
    Leave Computer Audio
    Note: if you are attending class remotely, make sure to join computer audio.

In your Zoom account, click the 'Profile' on the left side and view your profile.
Make the window big enough to view at least the information shown below.

Zoom Profile

(25) 5. Use the Snipping Tool to make a screenshot of your profile.

Save the screenshot as "Ex6" in the OneNote file in your ' ' folder.

Screenshot Ex6


Note-as of spring 2024 Outlook is updated, screenshots and directions below have been revised accordingly.
New Outlook interface

All course assignments are listed in the D2L calendar.
You view assignment due dates in your Outlook desktop client by subscribing to the .ics calendar feed provided by D2L.

In the first part you will obtain the .ics calendar feed from D2L.

  1. Log into D2L and find this course.
    Click on 'Calendar' or 'Materials>Calendar' from the menu.
    click calendar
  2. Click on the 'Settings' icon. (also note the Subscribe icons, you will use this later)
    click settings

  3. Make sure to check 'Enable Calendar Feeds"
    check enable calendar feeds
  4. Click the Subscribe button (see Step 2) and select your course from the list, then copy the calendar feed, and paste it into Outlook.
    select course
     calendar feed


  5. In the second part you will put the calendar feed into Outlook.

    Open Outlook Desktop, click the 'Calendar' icon in the left column to display your Outlook calendar.
    From the Ribbon 'Manage Calendars' section, choose 'Add Calendar' File>Account Settings>Account Settings...   When the dialog box appears choose the "Internet Calendars" tab, click "New..."  Paste the D2L calendar feed url, click "Add", use the course name as the folder name, click OK, then click close.
     add calendar


      calendar feed
  6. It will take several seconds to install, then your Outlook Calendar will appear with the new calendar feed for this course.
    You may need to adjust your calendar settings to view the due dates properly.
    'Week' view is shown below instead of the typical 'Work Week' view so that you can see the Saturday assignment due dates.
    outlook calendar
  7. Repeat as desired to add calendars from other D2L courses.
    You can also subscribe to calendars from your favorite sports teams, if they make the feed available.
    Ref: http://www.southendzone.com/ics/

(25) 6. After installing the D2L calendar feed for this course into your Outlook desktop client, take a screenshot of this course's calendar in Outlook using the Snipping tool.

Make sure your screenshot includes your username in the Outlook title bar.
Save the screenshot as "Ex7_OutlookCalendar" as a .gif, .png or .jpg file in the OneNote file in your Formative00_2 folder.


Screenshot Ex7


You created one .pdf (portable document format) file from the screenshots taken above.

(50) 7. Upload your completed 'Formative00_Part2.pdf' file to the D2L 'Formative00_Part2' Assignment folder.
...