Before you begin:
For this project you must first have Visual Studio 2017 Enterprise installed on your computer per the instructions in Formative00, Exercise 2.
This includes the web development environment and the GitHub Extension for Visual Studio.
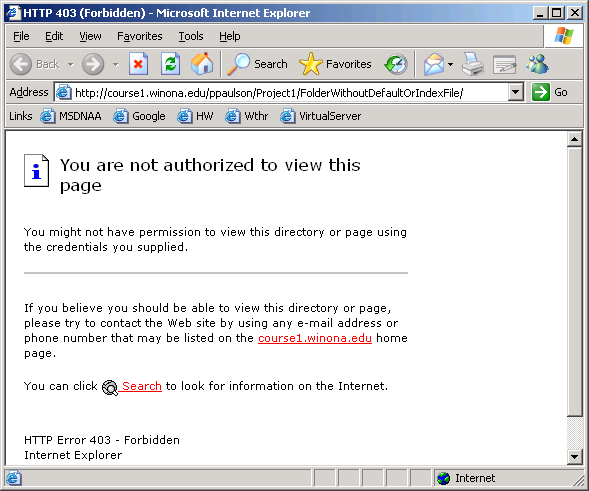
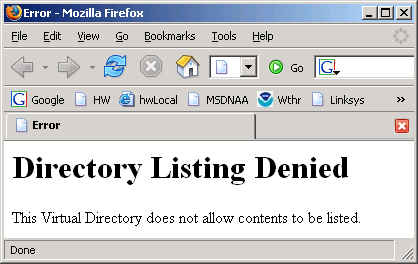
***
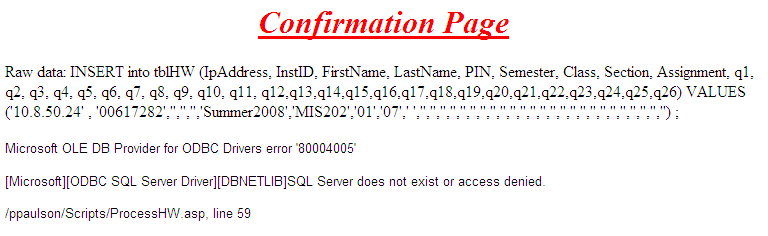
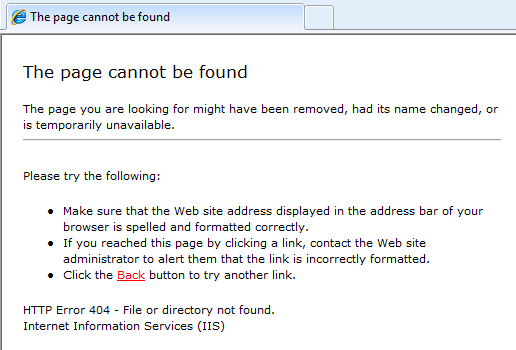
Publishing your work from off-campus requires that you must first establish a VPN connection to the WSU network. Otherwise you will get this ERROR. ***
Note: Proficiency with Microsoft Visual Studio and Git are valuable skills. Feel free to make use of the Lynda.com tutorials or the W3Schools website to improve your web design skills.
Grading criteria:
This assignment is worth 100 points, and is graded
based on the following criteria.
Grading is done only once, there is no awarding of points past the due date.
You are expected and required to have your website working correctly during the entire semester.
1. (20) Assignment website home page url submitted to database correctly using form per step 17.b
2. (20) Website url of the correct format: <YearTerm+CourseIdentifier>/<UserName>
3. (5) Student's Name at top of Assignment template-per step 5
4. (15) Feedback email address url with correct format, such as: mailto:StarID@go.minnstate.edu?subject=MIS202AssignmentFeedback&cc=ppaulson@winona.edu per step 6
5. (10) Confirming email sent to the professor-per step 14.g.
6. (20) First assignment hyperlink correctly formed, with correct
folder structure such as:
'http://classes.winona.edu/<YearTerm+CourseIdentifier>/<UserName>/Summative01/Assignmentxx.htm'
- per step 11
7. (10) Miscellaneous issues-which means not following items listed in these instructions, poor grammar or spelling.
8. You will continue to lose points from this and individual assignments if you do not link assignments correctly, or do other things that prevent me from being able to grade your assignment.
In effect, at the end of the semester you can end up with zero points for this assignment.
These instructions are used to create your course website for any of the classes being taught by Professor Paulson this semester.
Below are items you will come across, replace the general item with the specific one for your class.
- Replace <SemesterYear> with current semester and year, e.g. Spring2019
- Replace <Course> with the course, e.g. MIS202
- Replace <Section> with the appropriate course section, e.g. 02
- Replace <YourName> with your name, e.g. Joanne Smith
- Replace <UserName> with your WSU network username, e.g.jrstudent13
- Replace <StarID> with your Minn State issued StarID, e.g.ab1234cd
- Replace <CourseIdentifier> with the six digit course ID, e.g. 00xxxx
- Replace <YearTerm> with the current academic year identifier. Academic year starts in summer (1) and includes fall (3) and spring (5).
Current YearTerm is 20195 (Spring2019) - Do not use spaces or non standard characters in your folder or file names! Only use a-Z, 0-9 and ‘_’ (underscore) Why not? Bookmark example!
- It is easier to work with files if you can see the file extensions. In Windows Explorer select View>Details from the menu. Then choose Tools>Folder Options, select the Views tab, under ‘Advanced Settings:’ clear the box titled ‘Hide extensions for known file types’. Click on the ‘Apply to All Folders’ button, then click OK.
- You must have a WSU username and password, be registered for the class and have an Internet connection
to complete these steps.
Visual Studio quirks:
Make sure to press the refresh button to see the latest files.
Remember that an asterisk (*) next to a filename indicates that the file has been modified, make sure to save changes often, or publish your website.
and a remote web server where you upload or publish the local files and folders, so that the professor can view them (the remote site).
- Clone Your Assignment Files -
- Open Visual Studio
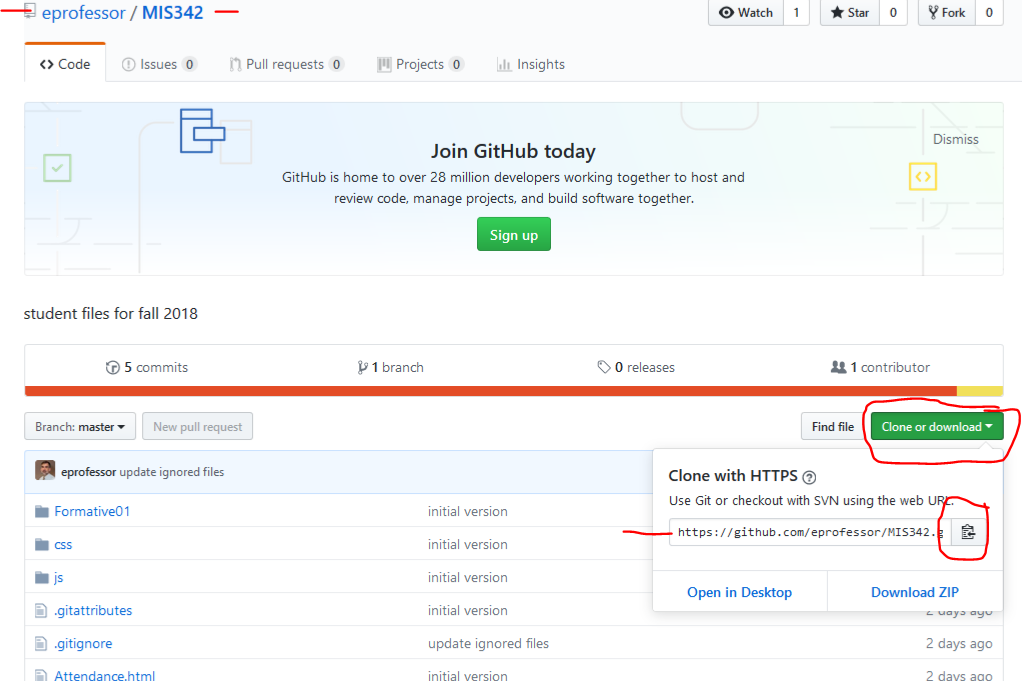
- Using a browser click on the appropriate GitHub course repository below:
- Click the 'Clone or download' button.
Make sure 'Clone with HTTPS' is displayed.
Click the copy icon so that you have the required url on your clipboard:
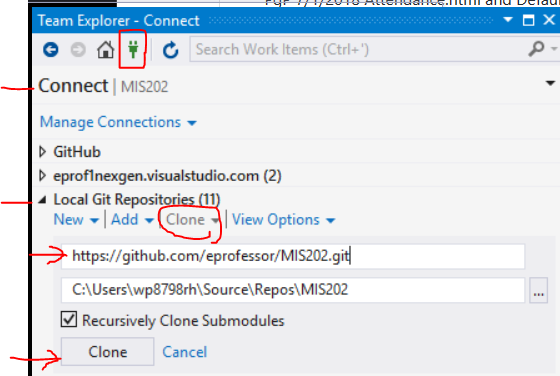
- In Visual Studio from the menu choose View>Team Explorer.
In the Team Explorer windows click the 'Connect' icon on the top row. It looks like an electrical plug.
Under 'Local Git Repositories'; click 'Clone'; paste the url into the top line where it says 'Enter the URL of a Git repo to clone <Required>'
Accept the suggested path for your local repository, it will have the form shown below.
Click 'Clone'
- The cloning process will take a few minutes, check the status bar in the lower left of Visual Studio for updates on the process.
- Once cloning is complete, a list of files and folders should appear in Solution Explorer.
If necessary, from the menu choose View>'Solution Explorer';
If Solution Explorer is blank, go to Team Explorer, click the 'Home' icon in the toolbar, then in the bottom 'Solutions' section click 'Open' and the solution files will appear.
Otherwise, click the 'Solutions and Folders' icon;
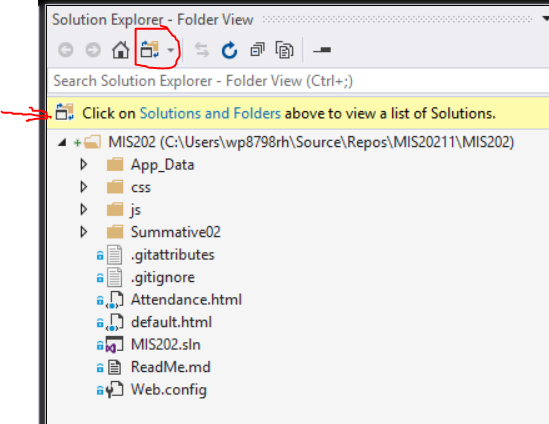
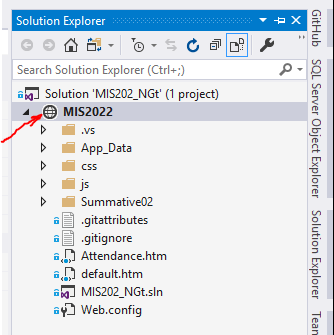
- When the globe icon appears in Solution Explorer your files are cloned and a solution has been successfully created.
- Set Your Constants- Open the /js/ folder and then open the Readme.txt file.
From the menu select File>Save /js/Readme.txt as... and in the File name: section of the dialog box enter constants.js and click Save.
- Update the constants.js file by updating the information between the double quotes with your email, first name, last name, StarID, course section number.
Leave the double quotes in place.
Example, if your first name is Joe, change"YourFirstName";to"Joe";
Note that your email address will be of the formStarID@go.minnstate.edu
Be very careful because an error in any of these will cause improper submission of your assignments,
resulting in a significant loss of points in your grading. - Save constants.js
- Update the constants.js file by updating the information between the double quotes with your email, first name, last name, StarID, course section number.
- Configure Your Home Page-
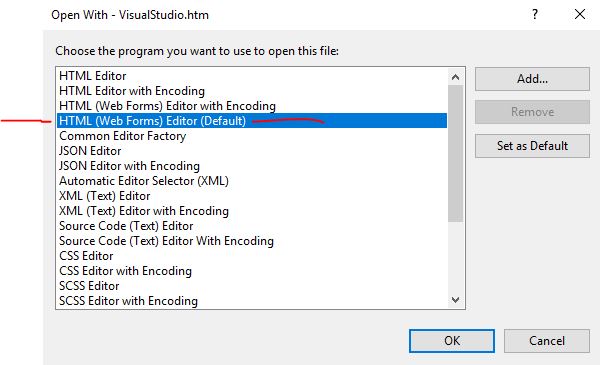
- In Visual Studio, Solution Explorer, right-click default.html, and in the pop-up menu click "Open with..." to bring up the dialog box
- Select "HTML (Web forms) Editor(Default)" click "Set as Default" ; then click OK.
Default.html will open in Design view.
- Select the text
[My Name]and replace it with your first and last name - In the email hyperlink
Email to [My First Name}place the insertion point just in front of[My First Name]and type in your first name. - Delete the text
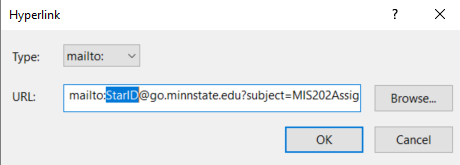
[My First Name] - Place the cursor anywhere in the email hyperlink, from the menu choose Format>Convert to Hyperlink, press the home key to go to the start of the text string, then replace 'StarID' with your StarID. Then click OK.
- Double-click and select the Attendance hyperlink, from the menu select Format>Convert to Hyperlink..., and browse to and select the file 'Attendance.html'. Then click OK.
- Double-click and select the first Assignment (for MIS202 it is Summative02), from the menu select Format>Convert to hyperlink.., and browse to and select the file 'Summative02.html'.
Then click OK twice.
Save your work.
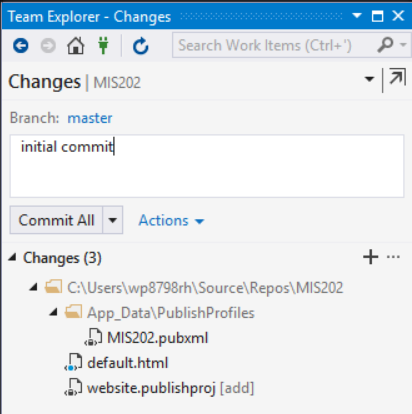
- Publishing settings
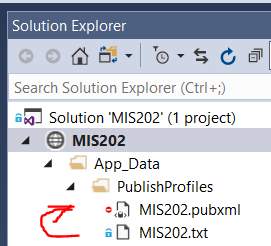
- In Visual Studio Solution Explorer open the folders App_Data/PublishProfiles/ and locate the <Course>.txt file.
- Save this file in the same folder as <Course>.pubxml For example MIS202.txt becomes MIS202.pubxml
- With the file still open, edit the path to add your network
username
and correct \<YearTerm><CourseID>\<Username>\; the courseIDs for each class follow:

- MIS202-01 000721 e.g. \\winona.edu\dfs\Students\ClassStorage\20195000721\jrstudent17\
- MIS202-02 000733 e.g. \\winona.edu\dfs\Students\ClassStorage\20195000733\jrstudent17\
- MIS342-01 000785
- MIS362-04 000746
- Publishing
- In Visual Studio from the menu select Build>Publish Web App
- Verify that the path being used is correct, then click 'OK'
- Note that if you are off-campus you first need to establish a VPN connection.
- If your website publishes correctly you will see the following type of information (especially 'Publish: 1 succeeded') in the 'Output' window accessible at the bottom of the screen:
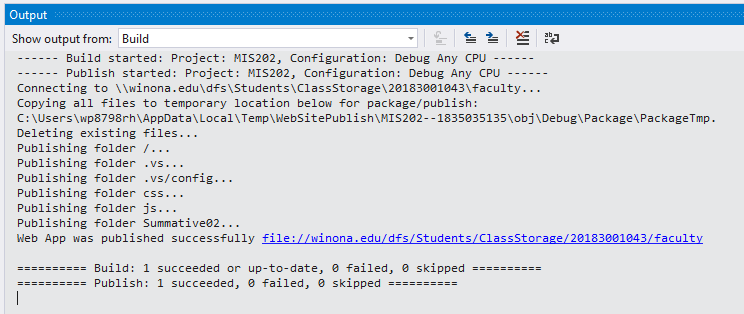
Your homework website is complete.
Next do a browser check to make sure your website functions properly.
Verify website functionality
- Using any browser type in:
https://classes.winona.edu/CourseID+YearTerm/Username><CourseID>/<Username>/ and bookmark this page. - In the dialog box that appears enter your StarID and network password to access your website.
- The displayed web page is known as directory browsing because you are presented with a list of files and folders on your website.
- The directory browsing view contains a lot of useful troubleshooting information-file and folder names, dates published, file sizes.
- In the directory listing click on 'default.html'. This is your homework website home page. Check the following:
- Proper spelling of name at top of page.
- Attendance page hyperlink works correctly, and displays correct email, firstname, lastname, StarID. Press the Submit button and you should see a confirmation message.
- First assignment hyperlink works correctly, and displays correct email, firstname, lastname, StarID.
- If your email address, firstname, lastname or StarID do not display correctly, you must go back and make corrections in your constants.js file.
- Check on your home page that clicking the 'Email to YourFirstName' hyperlink opens Outlook with an email addressed to you.
- If all these steps are correct, your website is complete. It is a good idea to have a TA or the Professor verify your website works.
- If you encounter a problem checking your website, welcome it as a learning and trouble-shooting opportunity.
- You are strongly encouraged to try to fix any problems on your own. If that fails seek out a TA.
- Once you verify that your website publishes to the correct location, and all values are correct-First Name, Last Name, Section... then you must NOT modify your MISxxx.pubxml or constants.js files.
And do NOT modify or relocate any other files in the website-you may cause problems with your website.
The next time you open Visual Studio click on the "course.sln" file to open your solution.
If the icon shown below does not appear, first follow the steps below.
If that does not work then check with a TA or the Professor, as something is wrong.

If the Globe icon does not appear next to your solution name-in Solution Explorer, then follow these steps.
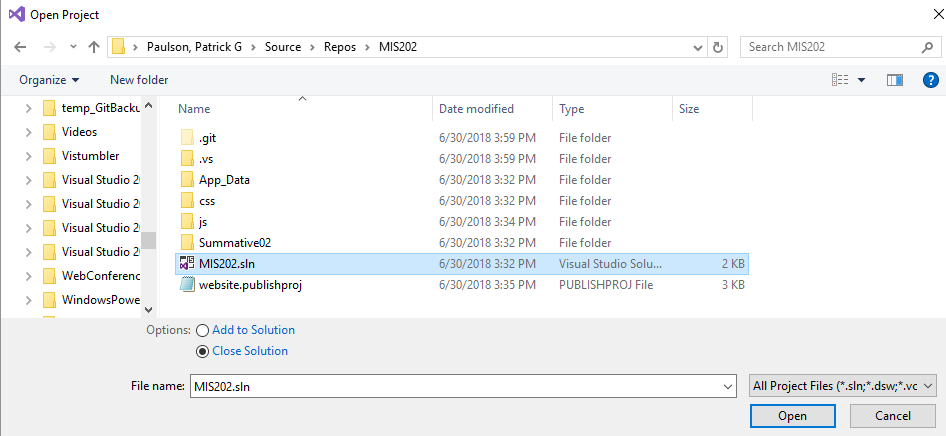
Close the solution in Visual Studio, then reopen by choosing File>Open>Project/Solution and browsing to /name/Source/Repos/<Course>
This will ensure that in the future your solution will appear properly on the Visual Studio Start Page.
During the semester you will retrieve Professor Paulson's course assignments (Formative, Summative, Project Reports...) by retrieving them from a GitHub repository.
The reason for this is to familiarize you with the tools (Git, Team Explorer, Visual Studio) that are being used by organizations to work together more effectively.
Note that Professor Paulson controls release of all assignments.
Because this is the first semester of this new method, things may need to be adjusted.
Due dates for all assignments can be found in D2L.
Typically the assignment will be made available on the eprofessor GitHub repository the Sunday or Monday before it is due.
Retrieving Assignments
- Course assignments are retrieved following these steps.
- Open your course solution in Visual Studio.
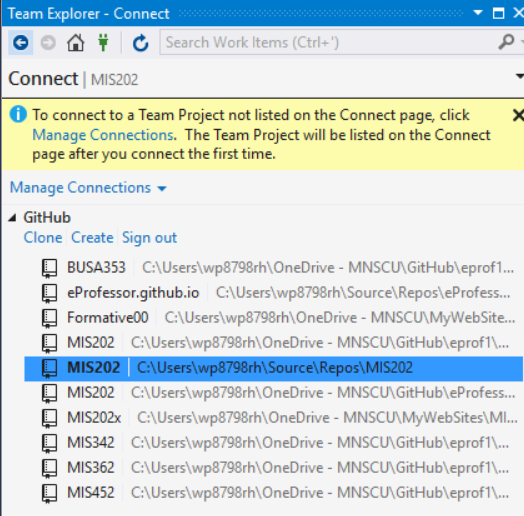
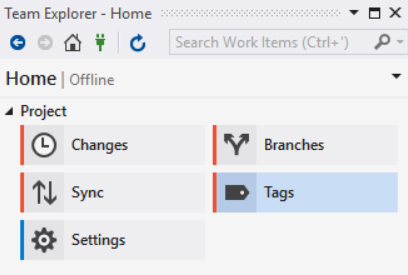
- In Team Explorer click the 'Connections' icon, then make sure the appropriate GitHub repo is in bold, so that you are working with the correct repository, below is shown MIS202.
- In Team Explorer click the Home icon, click Sync to find if any new or updated assignments are available.
- Under Incoming Commits press Fetch.
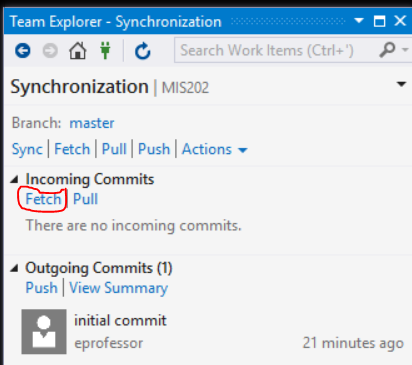
- If an assignment or change is available, there will be a number in parentheses after Incoming Commits indicating the number of files to be retrieved.

- Under Incoming Commits Press Pull and in a few minutes a message will appear that the repository has been updated.
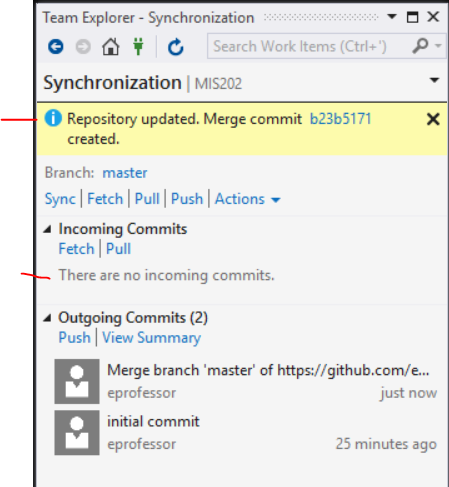
- In the top toolbar of Solution Explorer press the Refresh button and the new assignment will appear.
- Open your home page, default.html, and double click to select the assignment just retrieved.
- From the menu choose Format>Convert to hyperlink and browse to and select the assignment file, such as Summative03.html
- From the menu choose Build>Publish website to send all files to your website. (alternatively just publish changed files individually)
Completing Assignments
- You will fill in your answer in the 'Value’ field located below in the Properties Panel (if Properties Panel on the bottom of screen does not show up press Ctrl+F3)
- For questions with black text click on the answer text field, in the Property window, value field, type in the answer.
- You will complete the rest of your Assignment that contains questions followed by text fields in this way.
- For questions that require you to submit a file or make a screen shot:
- First complete the assignment using Excel, Access, VB....
- Save the file with the required file name.
- Place a copy of this file in the required folder.
This is very important, failure to organize your files will cause problems during assignment submission.
A primary objective of all Professor Paulson's courses is to improve your technology skills.
Following these directions is very important so that you develop skills that former students will tell you have been incredibly valuable in their careers.
- Make sure to save your work frequently.
- When you are finished go to File>Save to save your
work.
Use the Snipping Tool, by clicking the Start button and typing in "snip" to find it! Or do the following series of steps...
If you are asked for a screen shot remember the following tips
- Pressing the ‘Fn+PrtScrn’(Mac may be different) button copies all contents of your screen/monitor to the clipboard.
- Pressing ‘Fn+Alt + PrtScrn’ (Mac may be different) copies only the contents of the active window to the clipboard.
- Place the cursor at the location in your assignment where you want to place the image, and press Ctrl+V or choose Edit>Paste and the screen shot will appear-or your 'Snip' will appear. (If the 'Image Optimization' dialog box appears click 'OK').
- Choose
File / Save. Choose the appropriate assignment folder to save to. Use the suggested file name (example: Ex1).
Choose .png or .jpg as file type. Click Save.
- Local Website Check
- With your assignment solution open in Visual Studio, press the green triangle next to 'IIS Express' in the toolbar.
- In a few minutes the selected browser will open, showing a local copy of your website in directory-listing mode.
- Use this as a way to check all local website functionality, correcting any errors.
- Viewing your local website is for trouble-shooting purposes only!
Remember Professor Paulson cannot view the local copy of your website, only the copy on classes.winona.edu - Website Publishing - note that you can Publish your entire website, or just selected files.
- Make sure you are logged onto the WSU network. If off campus first establish a VPN connection.
- Open Visual Studio – make sure your website is displayed.
- If you are opening Visual Studio and your website is not open- you will find your web site from using the menu, select File>Open>Web site... Click on your site’s name from the Local IIS choices, and then click on Open.
- To publish, from the menu select Build>Publish Web App, make sure you have the correct course website listed, and click on 'Publish'.
- It is a good idea to check the 'Web Publish Activitiy' Output window to make sure that publishing was successful and there were no errors or warnings.

- alternative: From the menu refer to Website>Publish " " to publish a specific file.
- alternative: From the menu choose Website>Copy Web Site... in order to move around specific files
- warning: if your website does not publish your updated files, you may need to publish individual files or folders
- Internet Website Check
- In your browser navigate to: http://classes.winona.edu/<YearTerm + CourseID>/<UserName>/
- Your ‘default.htm’ web page should display.
- Verify that each assignment hyperlink works correctly, i.e. displays the proper page on your website. If not, you must return to Visual Studio and correct your hyperlinks.
- You must check your email hyperlink for proper operation by clicking on it while viewing it in your browser.
- You are strongly advised to use Outlook for your email program. It will be autoconfigured when you start it up while you are logged onto the WSU network.
- If the email hyperlink does not work correctly, that is, does not open Outlook with an email addressed to your webmail account, with a carbon copy (cc:) to my email account, and the proper subject line-then go back to step 6 and review and fix any problems.
- When satisfied that your website is correct, and your email hyperlink is correctly formatted, click on the email hyperlink. Outlook should start up and create a new email that is addressed to you, with a cc: to me.
- In the body of the email type "I have finished my Project 1 website and everything appears to work OK."
- Press the send button.
- Verify that you have successfully received this email in your WSU email account.
- Do not worry if you send this email several times.
- Realize that the copy of this email is your proof of completing this assignment on time. If it does not work correctly, or a copy is not sent to me, you have not proven that your assignment is complete.
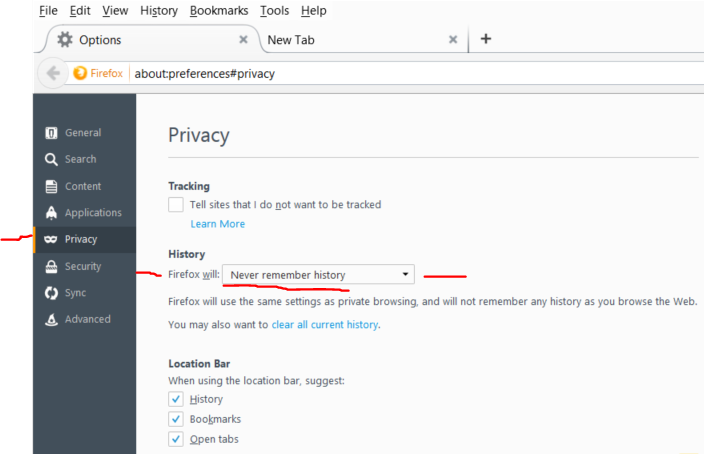
- Each time you do an assignment, make sure to check for proper operation of the hyperlinks on your website home page (default.htm), and that your assignment and all the screen shots are functioning properly. Remember that if you make any changes to a assignment or screen shot, you must republish those files. Then you must make sure to recheck the website, using your browser. Be aware that you may need to press the F5/Refresh button to view the latest file. Sometimes you may need to repeatedly press Ctrl+F5. Alternatively, you can set your browser to request a new web page each time you view a url.
Refer to the table below.
Internet Explorer: Tools>Internet Options>Browsing History>Settings Firefox: Tools>Options>Privacy, choose "Never remember history" 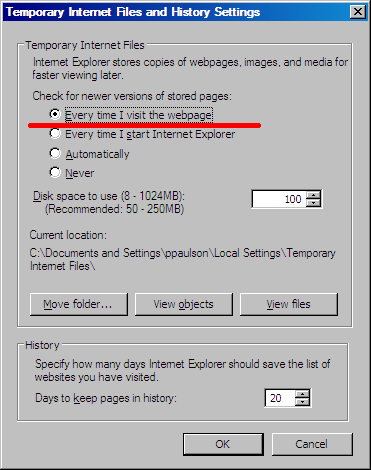
Note: 8/17/2018 VS2017 15.8.0 File System Publishing of selected files is not available. You must publish entire site. Microsoft is working on a fix.
- Submit Assignment Pages
- The submit button is on each assignment page. Your assignment is not considered done until you have completed the submission process and received confirmation of your submission.
- If not already at your homepage:
i. Open your browser and navigate to: https://classes.winona.edu/<YearTerm + CourseID>/<UserName>/.
ii. Your ‘default.htm’ webpage should display.
iii. Navigate to your Summativexx page.
iv. Make sure that your assignment is completed. Check that screen shots display properly, all answers are completed, and your name and assignment information is filled in. If not, go back to Visual Studio and complete or correct any problems or errors.
v. When you are satisfied with your assignment, click the Submit button to submit your assignment.
vi. You
will see a confirmation page telling you that your assignment was submitted. There
will be a lot of other info on there that you probably will not understand – just
ignore. It is a good idea to save this confirmation page. Click
File>Save As…. Choose an appropriate folder to store these
pages. A possibility is Libraries\Documents\<Course>\ConfirmationPages\
If instead of a confirmation page you see a warning or error message, then
your assignment did not submit and you will not receive credit for it. Save a
copy of the page containing the warning/error. If you cannot figure out what
went wrong (such as not being connected to the Internet), then email this page
to the instructor before the assignment is due. Make sure
the email subject line contains at least the course, section and wording "Assignment
Submission Problem".
vii. Click
on the Homepage hyperlink to go back to the professors's website… or
click the Back icon in the menu to go back to yours.
- Assignment Inquiry – Review what assignment you have already submitted and when it was submitted.
- On https://eprofessor.azurewebsites.net click on Inquiries>Assignment Submissions.
- You will need to enter your Last Name and your StarID; and select the proper semester, class and section.
- Press the ‘List Submissions!’ button.
- You will see what you submitted and when. This is handy if you cannot remember what you have done so far for the class or to make sure your assignment was turned in on time!
- Submit your URL – You will use a FORM to do this.
- These steps need to be done only once at the start of the semester. If for some reason you change the URL to your website (name change or submitting a new social security number will cause a username change) make sure to notify your professor. See if they want you to repeat this step.
- Using your broswer, navigate to the form used to submit your URL to Professor Paulson- it is at this location
- The name of the form is Studentwebs Assignment Website URL Submission Form.
- Fill out form with the term, campus, class, your last name, your first name, your StarID (also use the StarID for assignment and attendance) and your website address. You will fill out this form the normal way by just clicking in the fields and entering your information.
- Press the SUBMIT button.
- Your will receive a confirmation page telling you that your website URL was submitted successfully. It will also tell you the time and date you submitted it.
- Next make sure that the url that you submitted works by going to
the form shown below, entering your last name and StarID, and then click
on 'Check URL'. Your assignment website home page should be displayed. If
not, I cannot see it either, and there is a problem with your website. You
must correct any problems!
URL Inquiry
- URLInquiry – Confirm that your website URL has been submitted correctly.
- On https://eprofessor.azurewebsites.net click on Inquiries>Website URL.
- You will need to enter your Last Name and your username.
- Press ‘Get URL!’ button.
- You will see what you submitted and when. Check to make sure information is correct. If you are in multiple classes with Professor Paulson, information for all your websites will be listed.
- Click on Check URL in the Hyperlink column. This should display your home directory for your website. If you get a 'page not found' type of message there is something wrong with the URL that you submitted. Recheck your information and resubmit your url. Or stop by Somsen 207 and ask one of the STARs for assistance. Or see Professor Paulson.
- Recomnended care and maintenance-
- Add links to your browser toolbar to access your studentwebs site quicker.
- Make periodic backups of your website using One Drive for Business.
- Create another website to experiment with and learn about the technology (such as 'studentwebs')

 IE6
IE6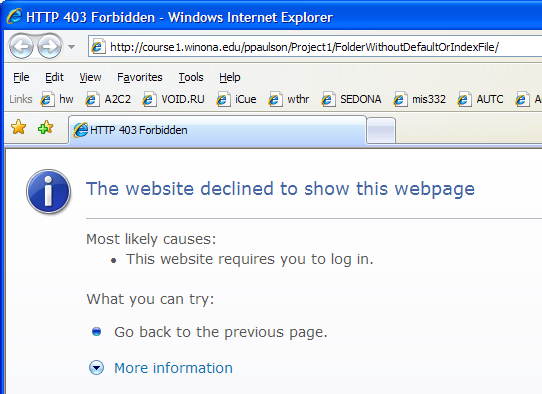 IE 7
IE 7
 FireFox2
 IE8
IE8